How to shoot with a DSLR

Holly's How To's | Lesson ONE!

I'm so excited to start this SERIES with y'all! I know learning to use your fancy DSLR camera can seem very overwhelming and I don't want it to be for you!! So, today I am sharing a simple tip that will help you INSTANTLY get better images!

Last lesson, I shared a HUGE glossary of terms. If you need to reference those terms please click below.

As always, don't forget to ask me those questions!!! I have several questions lined up for the next video! ;)

Click play and let's start camera nerding together!!!

Want to sign up to receive my newsletter? Whatcha waiting for?!

 
xoxo,h.jpg
 

Holly's How To's SERIES | A Guide to shooting better!

Holly's How To's Header.jpg

I have been wanting to do a blog SERIES like this for many years! I am finally making the time to answer some of your most common questions I receive! A couple of weeks ago I put it out there on my Instagram Stories that I wanted you to send in some “Photog Questions”. Y'all are so awesome! You didn’t shy away from asking ANYTHING and I LOVE that about you guys! I’ve also been trying to also rack my brain from WAAAAY back when I started my photography business. . .what were the main things I wanted to know?!

SO, in this SERIES, I will cover these topics AND SO MUCH MORE!!!

  1. A Glossary of terms! Although, not the funnest part of this SERIES, this will be helpful in the beginning as we navigate through!
  2. My TOP questions: What is my FAVE lens, what lenses do I have and what camera bags do I use?
  3. What editing program do I use and some helpful tips and tricks please?!

AND don’t worry!! I will also be sharing some helpful “How To’s” for you DSLR users later in the SERIES!!! Feel free to SUBSCRIBE to the newsletter!

AND keep the questions coming!! As we go through this SERIES please don't be shy! I remember what it was like when I first started playing around with my camera! I had NO idea what the terms were and to be honest some times I didn't quite know what I was trying to figure out. . .I knew it had a term just wasn't sure what it was all called! Just explain it to me as best you can and I will take it from there. ;)

So, let's dive in with the. . .

GLOSSERY OF TERMS
I wanted to take this time to go over a few terms that might be new to you. So, if you see them later you will have a better understanding of what I’m referring to and I've tried to add photos under each term to help! I'm a visual learner and thought this would be super helpful for you too!
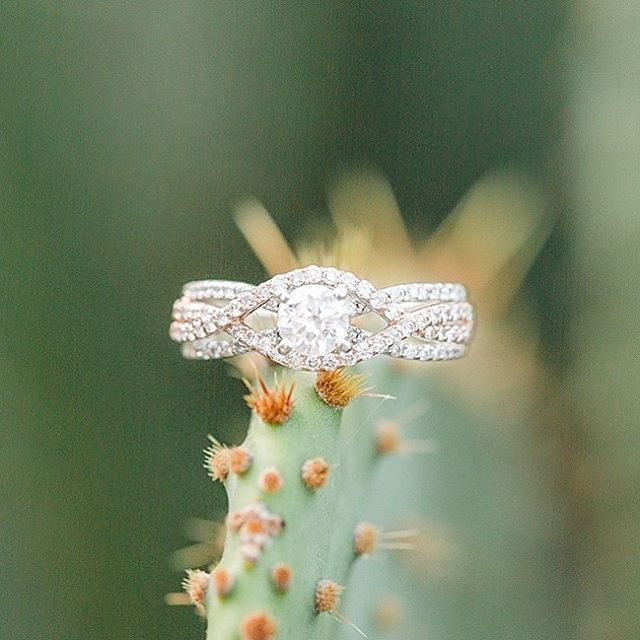
mm
When you see 85mm, I am referring to the millimeter of the focal length of a lens. This is how wide or how tight a lens will zoom in or out. 

social_circle_ga_photographers-9.jpg

AMBIENT LIGHT  
This is the available light that surrounds your subject. Example: the sun!

athens_ga_wedding_photographers-99.jpg

SHUTTER SPEED
The shutter is the part of your camera that clicks open and closed and it’s measured in seconds. This is another way to allow more light into your camera to create a darker or lighter image. When your shutter speed is HIGHER (1 second is a really long exposure time), your shutter will stay open for a longer time frame. If there is movement with your camera or from your subject, the image with appear blurry. When your shutter speed is shorter, 1/100th of a second or 1/1200th and so on, your shutter will close quicker and produce a sharper more in-focus subject/image.

Think of it like this: How long do you want to EXPOSE your subject to the available light? Are you trying to keep your shutter open for a long time to create a blurry effect? Or are you trying to create a more sharp image by exposing or closing your shutter faster? It’s how long you want to EXPOSE your subjects to the AMBIENT light. If there is movement, like in the photo below, David picked Win up and took off into the field and their dog, Bug, followed behind. There is a lot of movement in this image and yet it is still in focus because I used a fast shutter speed.

When I shoot outside, depending on how much AMBIENT light there is I will start with determining what my EXPOSURE/SHUTTER SPEED needs to be. As a little guide, if it’s full sun I usually start at about 1/2500th of a second. This allows less light to come in because there is already so much AMBIENT light available and my shutter closes faster. 

culloden_georgia_wedding_photographers-108.jpg

APERTURE
This is the size of the opening in the lens. It's measured in f/stops. When you open up your aperture (lower numbers like 1.2 f/stop and so on) you will allow more light to come into your lens and soften the background which also creates a brighter image with less in focus. When you use a higher aperture you will close the hole in your lens allowing more will be in focus. In this image below I used a higher APERTURE (2.8 f/stop) to allow all of the bridesmaids to be in focus but still have a soft background.

9_oaks_farm_monroe_ga_wedding_photographers-98.jpg

BOKEH
This will be your BFF in creating a more creative image! Bokeh is achieved when using a lens that has a low aperture (1.2-2.8 f/stop). It’s the little light circles in the background of an image or if an image is out of focus it will create this effect as well. The strand of Christmas lights in the background of this image give that pretty BOKEH effect!

social_circle_ga_photographers-1.jpg

DEPTH OF FIELD
In just about all of my images you will notice the "depth of field". This is where my subjects are in focus and the background is a bit unfocused and soft. I usually get this effect by shooting more wide open with a lower aperture around 1.2-2.8 f/stop.

starrsville_plantation_covington_ga_wedding_photographers-263.jpg

ISO
ISO is usually one of the last settings I will change. This setting will also allow more light into your images. If your ISO is too high you start to lose details in your image, overexpose your image or create too much grain in your image. It’s my last go-to setting when adding brightness to my images. In the image below, I chose not to crank up the ISO in order to keep all of the white fabric exposed correctly. If I would have cranked up the ISO too high, the white fabric of their dresses would have been SO bright it would have become OVEREXPOSED. And just a little tip, if you overexpose an image, you cannot fix that in post processing/editing!

9_oaks_farm_monroe_ga_wedding_photographers-74.jpg

VIEWFINDER
When you look into the little hole on the back of your camera, you are looking through the VIEWFINDER.

FOCAL POINTS
When you look through your VIEWFINDER, you will see several little black dots. Some cameras are set up to have 9 focal points and others 49! Depending on how many focal points you have will determine how you can compose your image or place your subject in the image. When you press your shutter button, if you “half click” (press down slightly) your camera will focus on whichever focal point you tell your camera to use. Some cameras are set up for AutoFocus and I don’t recommend that at all! When you use autofocus you are allowing your camera to focus on whatever it finds first and that may not be what YOU want as your subject in your image! Look through the booklet that came with your camera and determine how to control this setting on your own! ;)

RULE OF THIRDS
The rule of thirds is a simple yet very important guide you can use to compose an image! When you look through your view finder you are seeing a rectangle image (the image in front of you). If you were to section off that image into thirds, whether you are holding your camera horizontally or vertically, you will come up with nine boxes and four intersecting points. Refer to the image below! I know this sounds super complicated but it really isn’t! I promise!!! When composing your subject within that rectangle, it looks more pleasing to the eye, when your subject is lined up with one of those intersections or centered. It’s basically where you choose to place your subject in your image to make it visually pleasing!

In this image below, I chose to place my bride, Allie and her Daddy, in the top left intersection. I loved the tall draped fabric in the background and the BOKEH of the sting lights too!

Screen Shot 2018-04-27 at 11.49.22 AM.png

GRIT
This refers to the little black dots that can show up on your image if you are shooting in a dark location or shooting with a high ISO. It’s also called “grain” or “noise”. 

OCF
OCF stands for Off Camera Flash. This refers to a speedlite or Alien Bee (another type of COF).

buckhead_ga_wedding_photographers-206.jpg

WHITE BALANCE
You can get super fancy here or just let you camera take charge of this setting! White balance determines if your image is warm (orange tones) or cool (blue tones). There are several settings in your camera that can help you control this. 

Example: If you take a photograph of a white wedding dress, depending on the surroundings and AMBIENT light, if you are in a room with overhead lights on and those lights are producing an orange glow and the room has dark wooden walls, if your camera is set to Auto-White Balance (AWB) the dress will pick up the warm, orange tones and the image you capture will appear very ORANGE. However, if you choose to shoot in MANUAL or KELVIN, you will have more control over this and can choose your own settings - which equals LESS EDITING!!!

KELVIN
Kelvin is how light temperatures are measured. I know this sounds super nerdy!!! But once you accomplish this setting you will understand how important it is to producing amazing images that are geared towards your STYLE!! Whether you like a more warm image or a cooler image - using the KELVIN setting is how you will create this look IN CAMERA and save you loads of time editing! To give you a guide, the higher the number the warmer the image, the lower the number the cooler the image will appear! When I first got started with using KELVIN, I would relate warmer images with hot temperatures and cooler images with lower temperatures just like we measure the degrees outside. ;) I will go into more detail on this later but I just wanted you to be familiar with the term and to have a general idea of it. ;)

KELVIN chart.jpg

I found the chart below to help you visualize all this!! The first line is explaining the f/stop. The second line is explaining EXPOSURE/SHUTTER SPEED and how a fast shutter will be more in focus compared to a slow shutter speed, and lastly how a high ISO will create grain in an image.

f:stop chart.jpg
Shew! I know that was a lot to take in! BUT I know you can totally handle it!

Learn those terms and as we continue on with my Holly's How To's SERIES these terms will be brought up over and over again! So you will pick up on it quickly!! NOW, get ready for the next blog and send in ANY questions you may have! Even if you don't know the terms just explain it the best you can!

Happy shooting!!!

 
xoxo,h.jpg